 how-to
How to Plan Small Kitchen Storage: A Step-by-Step Guide
Table of Contents
- Step 1: Measure Your Space and Document Current Layout
- Step 2: Assess Your Storage Needs and Inventory
- Small Kitchen Layout Ideas for Maximum Efficiency
- How to Organise Kitchen Cupboards for Easy Access
- Kitchen Cabinet Storage Solutions for Compact Spaces
- Small Kitchen Pantry Ideas and Larder Organization
- Common Planning Mistakes to Avoid
- Mistake 1: Buying organisers before measuring
- Mistake 2: Planning storage for what you wish you owned
- Mistake 3: Ignoring accessibility and safe reach
- Mistake 4: Overcomplicating the system
- Mistake 5: Choosing storage that is hard to clean or maintain
- Mistake 6: Planning for today only
- Mistake 7: Not measuring the result
- A quick pre-purchase checklist
- Frequently Asked Questions
Last Updated: October 9, 2026
Step 1: Measure Your Space and Document Current Layout
To plan small kitchen storage, start by measuring every dimension: record the height, width, and depth of each wall, cupboard, and gap, note where pipes, windows, and appliances sit, and photograph from multiple angles.
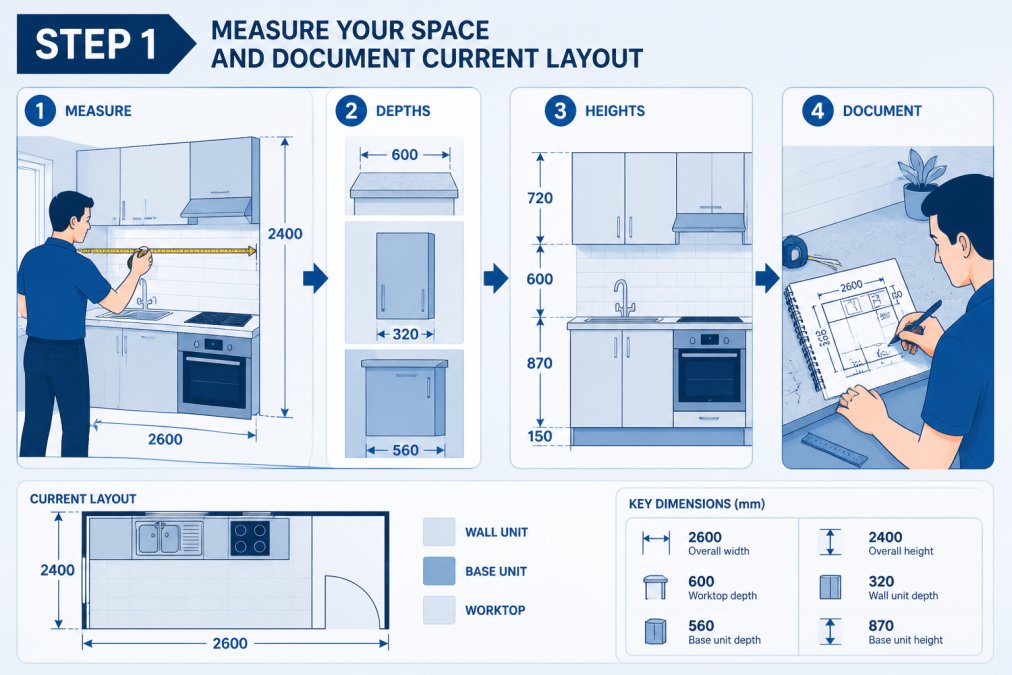
Create a simple floor plan on paper or with free online tools, marking appliances, door swings, existing storage, natural light, and foot traffic. This shows where to add storage without blocking movement.
Step 2: Assess Your Storage Needs and Inventory
Before buying anything, open every cupboard and drawer and list what you actually store by category: pots and pans, dishes, glasses, food, utensils, appliances, cleaning supplies.
Sort items into three groups: use daily, use weekly, use occasionally.
Measure your largest items, tallest pot, deepest mixing bowl, widest baking tray. These dictate shelf spacing and cabinet dimensions.
Consider your household's needs, how often you cook, whether you store lots of fresh produce, whether young children need safe, accessible storage.
Small Kitchen Layout Ideas for Maximum Efficiency
Layout determines where storage can physically go, so plan small kitchen storage before buying a single organiser. Each of the four common configurations has its own strategy, renter-safe version, and cost tier.
Galley kitchens (two parallel runs)
A galley typically leaves a 1,000-1,200mm walkway between runs. Anything intruding makes the kitchen feel narrower, so keep storage on walls and inside units, not on the floor.
- Best strategy: vertical storage on both sides. A wall rail with hooks above the worktop holds utensils, pans and mugs; a second rail on the opposite wall holds cloths, measures and small tools.
- Renter-safe option: tension-mounted or adhesive rails and over-door hooks. These avoid drilling and lift off cleanly at the end of a tenancy.
- Budget tier: no-cost to low. Reuse existing hooks and rearrange cupboard contents before buying anything.
- Trade-off: open rails collect grease near the hob, so position them at least a worktop-depth away from cooking surfaces.
L-shaped kitchens (two runs meeting at a corner)
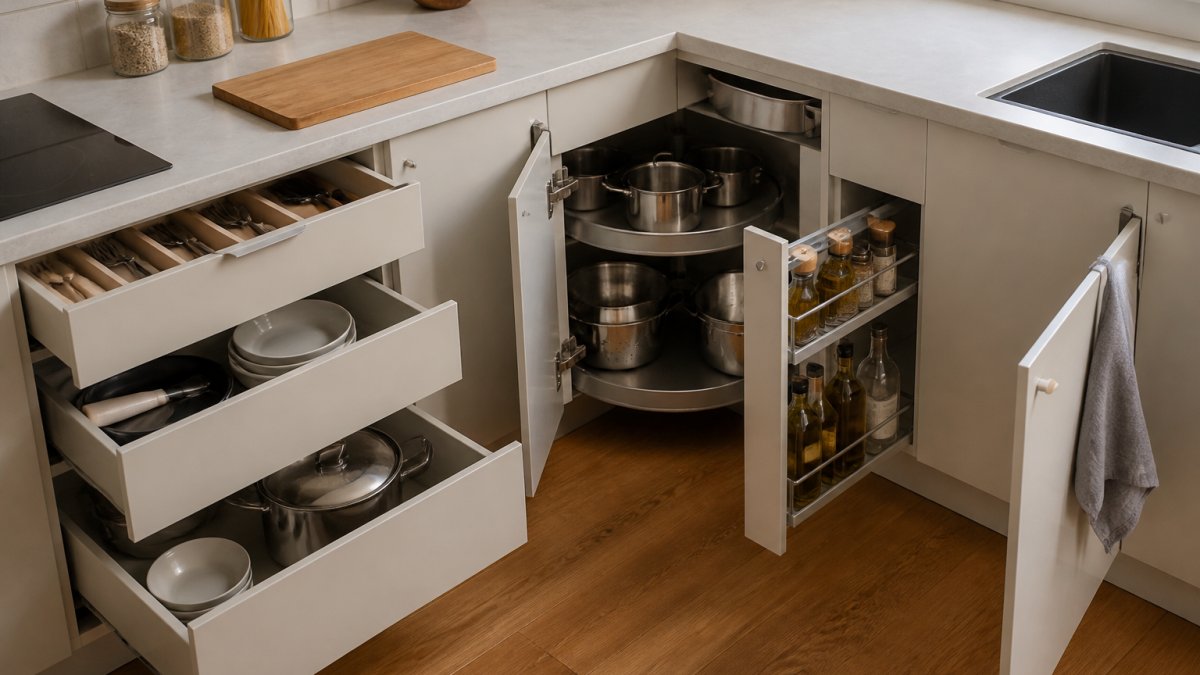
The corner is the make-or-break zone: a standard 900mm corner base unit loses much of its usable volume because the back is unreachable. Two fixes work:
- Carousel (lazy Susan): a rotating tray brings the back of the cupboard into view. Half-moon or kidney-shaped trays suit corner units better than full circles because they clear the door.
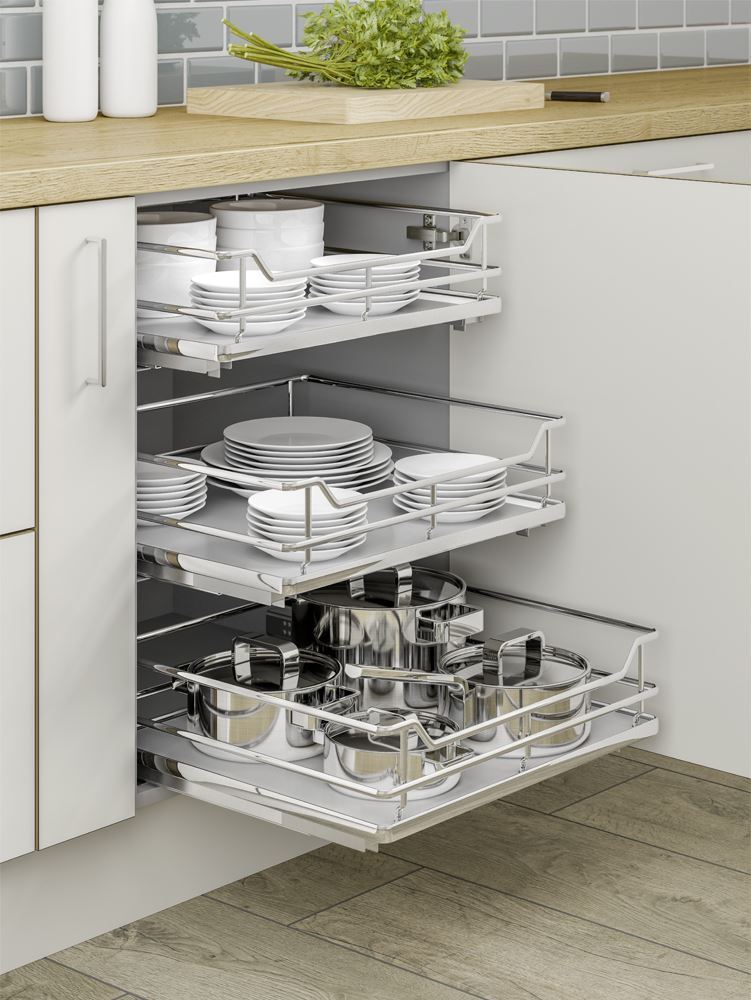
- Pull-out corner basket: slides the whole contents forward. Usually more expensive than a carousel but easier to load and clean.
- Renter-safe option: a freestanding carousel placed inside an existing cupboard, plus tiered shelf risers on the straight runs.
- Trade-off: carousels can rattle and are awkward for tall bottles; pull-outs need a clear door swing.
Single-wall kitchens (everything on one run)
With one wall, every storage decision competes for the same vertical strip. Prioritise by frequency of use, not category.
- Best strategy: go as high as is safe and as low as is comfortable. Add a shelf above wall units if the ceiling allows, and use under-shelf baskets to create a second tier beneath existing shelves.
- Renter-safe option: over-cabinet racks, adhesive hooks and freestanding slim trolleys that slot beside the fridge.
- Budget tier: low to mid. A single tall shelving unit often adds more usable capacity than several small gadgets.
- Trade-off: stacking too high pushes daily items out of comfortable reach, which is the most common cause of abandoned storage.
U-shaped kitchens (three runs)
A U-shape offers the most storage but can become a dumping ground because capacity exceeds need. Distribute deliberately:
- Central run: daily items at eye level and within arm's reach of the main work zone.
- Outer runs: occasional, seasonal or bulk items.
- Corners: carousels or pull-outs, as with an L-shape.
- Trade-off: too many cupboards can hide clutter rather than solve it. Audit each run against your inventory before adding more.
Plan the layout on paper first
Sketch your layout to scale and mark:
- Door swings, a shelf or rail must not block a cupboard or appliance door.
- Appliance clearances, leave the manufacturer's recommended gap around ovens, fridges and extractors.
- Reach zones, see the ergonomics guidance below.
- Where you will actually stand, the work triangle between sink, hob and fridge should stay clear.
Ergonomics and safe reach
Storage only works if people can reach it without strain. A rule of thumb used by many designers:
- Prime zone (roughly waist to shoulder height): daily items, plates, mugs, pans, cooking tools.
- Secondary zone (above shoulder to about eye level): weekly items, baking equipment, serving dishes.
- Low zone (below waist): heavy items, large pots, appliances, bulk dry goods.
- High zone (above eye level): occasional or lightweight items only. Avoid storing heavy or fragile items overhead, and never store items that require a step stool directly above a hob or walkway.
If children or older adults use the kitchen, keep their everyday items inside their own comfortable reach rather than assuming one height suits everyone.
Renter constraints at a glance
If you cannot drill, prioritise in this order: rearrange existing cupboards, add freestanding or over-door storage, then use adhesive or tension-mounted fittings. Adhesives work best on smooth, clean, dry surfaces and should be removed carefully at the end of a tenancy.
How to Organise Kitchen Cupboards for Easy Access
Cupboard organization makes or breaks a small kitchen.
Use drawer organizers to maximize drawer space.
Install pull-out baskets so you can see and reach items at the back without fishing around.
Label everything, especially in a shared household. Clear labels mean family members know where things belong.
The inside of a cupboard door is wasted space in most kitchens.
Kitchen Cabinet Storage Solutions for Compact Spaces
Custom kitchen cabinets solve problems that standard solutions can't.
Cabinet height matters enormously.
Shelf spacing should match your items: plates need 300mm between shelves, bowls 400mm.
Corner cabinets are critical in small kitchens.
Drawer cabinets work better than open shelves for frequently-used items in small spaces.
Pan shelf organizers store cookware vertically instead of stacking.
Small Kitchen Pantry Ideas and Larder Organization
Use vertical space ruthlessly in pantry storage.
Clear storage containers transform pantry organization.
Lazy Susans work brilliantly for pantry items.
Door storage adds capacity without taking floor space. Adhesive hooks hold tea bags or snack packets.
Pull-out baskets inside pantry cupboards let you access items at the back without reaching.
Organize by category, baking supplies together, breakfast items grouped, snacks in one area.
Common Planning Mistakes to Avoid
Most small-kitchen storage plans fail for predictable reasons. Here's a checklist to run before you spend anything, plus a way to measure whether your plan is working.
Mistake 1: Buying organisers before measuring
The most common error is buying a tiered rack, carousel or container set before confirming it fits. Cupboard interiors vary, so measure the internal dimensions of every cupboard and drawer you intend to organise, then check them against the product's stated dimensions, not the external ones.
- Fix: keep a single page of internal measurements (width × depth × height) for each unit and take it with you when shopping.
- Trade-off: measuring takes an hour; returning ill-fitting organisers takes longer and often costs postage.
Mistake 2: Planning storage for what you wish you owned
It's easy to design around an idealised kitchen rather than the one you have. An honest inventory, what you actually store, how often you use it, how big the largest items are, prevents this.
Mistake 3: Ignoring accessibility and safe reach
Storage that is too high, too low or too deep goes unused, and awkwardly stored items get forgotten, duplicated and thrown away. Keep daily items in the prime reach zone, heavy items low, and high shelves for lightweight or occasional items.
Mistake 4: Overcomplicating the system
A pantry divided into ten micro-categories sounds impressive and collapses within a week. Aim for broad, obvious groupings, baking, breakfast, snacks, tins, that everyone can follow without a label key.
Mistake 5: Choosing storage that is hard to clean or maintain
Shelves and organisers that are awkward to wipe down get neglected. Prefer smooth, removable inserts over fixed, fiddly ones, and build in a five-minute weekly tidy of the busiest zone so the system doesn't drift.
Mistake 6: Planning for today only
Households change: new appliances, different diets, children growing. Adjustable shelving and modular organisers adapt; fixed, built-in systems do not. Where you have a choice, favour adjustable over fixed.
Mistake 7: Not measuring the result
This is the gap most storage guides skip. Before you reorganise, record a baseline; after, record the same figures. A tape measure and notepad are enough.
A simple capacity check:
- Count usable shelf runs. For each cupboard, note how many shelves are actually accessible (not blocked by a door frame or another shelf).
- Measure usable depth. Record the depth you can reach comfortably, not the full internal depth. The difference is dead space.
- Note the number of items per zone. Count how many daily-use items sit in the prime reach zone before and after.
- Track retrieval time. Time how long it takes to find three common items (a pan, a tin, a utensil) before and after. A drop from, say, 30 seconds to 10 seconds is a meaningful improvement.
- Review after two weeks. If a zone has become messy or unused, the plan needs adjusting, not more products.
A quick pre-purchase checklist
- Internal dimensions recorded for every unit.
- Inventory completed and sorted by frequency of use.
- Largest items measured.
- Reach zones marked on the plan.
- Door swings and appliance clearances checked.
- Renter constraints identified (drill or no drill).
- Budget tier chosen before browsing.
- Baseline capacity figures recorded.
Frequently Asked Questions
How do I know how much storage I actually need in a small kitchen?
Start by listing everything you store: pots, pans, crockery, glasses, tins, and dry goods. Measure your current items and allocate 20% extra space for future purchases. A small kitchen typically needs 60-80% of standard kitchen storage capacity. Use your inventory from Step 2 to calculate exact shelf and drawer depth required. This prevents over-buying storage solutions that won't fit.
What's the best way to organize a small kitchen with an awkward layout?
Work with your layout rather than against it. Use corner cupboards with lazy Susans to access dead space, install wall racks and hanging rails above worktops for frequently used items, and add tiered shelving inside cabinets to maximize vertical space. Group similar items together, pots on one shelf, tins on another, so you know exactly where everything is. This reduces clutter and makes the space feel larger.
Can I customize storage solutions if I'm renting and can't make permanent changes?
Yes. Use self-adhesive hooks, over-door organizers, and freestanding shelving units that don't require drilling. Under-shelf baskets and drawer organizers work in rental kitchens without damage. Magnetic strips on the side of the fridge hold knives and metal utensils. These solutions are removable and portable, making them ideal for renters who need flexibility.
How should I arrange items in upper versus lower kitchen cabinets?
Store frequently used items at eye level and within easy reach (roughly 60-180 centimetres from the floor). Keep heavier items like pots and pans in lower cabinets for safety and ease of access. Upper cabinets work best for lighter items, glasses, and things you use occasionally. Store sharp items like knives in a block or on a magnetic strip at a safe height, away from children's reach.