 how-to
Custom Kitchen Unit Design Process Explained
Table of Contents
- Understanding the Custom Kitchen Unit Design Process
- Step 1: Assess Your Household Needs and Cooking Habits
- Step 2: Take Custom Kitchen Unit Measurements and Document Constraints
- Step 3: Plan Your Kitchen Layout Planning and Work Triangle
- Step 4: Create Your Kitchen Design Checklist Before Ordering
- Step 5: Implement Custom Kitchen Storage Ideas and Cabinetry
- Step 6: Review Your Design and Approve Before Manufacturing
- Step 7: Coordinate Installation and Final Handover
- Frequently Asked Questions
Last Updated: October 11, 2026
Understanding the Custom Kitchen Unit Design Process
Creating a bespoke kitchen starts with understanding what you actually need. Many homeowners rush into ordering custom kitchen units without thinking through how they'll use the space. That's where most projects run into trouble.
The custom kitchen unit design process requires assessing your household, measuring accurately, planning layout, and designing with real constraints in mind. At Wjskitchenwarehouse, we've guided homeowners and trade professionals through this process over 30 years.
Step 1: Assess Your Household Needs and Cooking Habits
Understand how you actually cook and live, don't design around an imaginary version of yourself.
Ask yourself these questions:
- How many people use the kitchen daily?
- Do you cook elaborate meals or mostly reheat food?
- Do you bake regularly, or rarely?
- How much storage do you need for groceries, pans, and appliances?
- Do you entertain frequently?
- Who uses the kitchen, young children, elderly relatives, people with mobility issues?
Your answers shape everything. A family that cooks daily needs different appliance placement than someone who mostly makes coffee and toast; bakers need dedicated storage for tins and mixers; households with young children need safety considerations built in.
Write these needs down. They become your design brief, the foundation for all decisions that follow.
Step 2: Take Custom Kitchen Unit Measurements and Document Constraints
Accurate measurements are non-negotiable. Undershooting by 10mm means your custom carcass won't fit. Overshooting means wasted space and poor proportions.
Measure everything:
- Wall lengths (top, middle, and bottom, walls aren't always straight)
- Ceiling height at multiple points
- Window and door positions with exact dimensions
- Existing service locations (water pipes, gas, electrics, vents)
- Radiators, boilers, or other fixtures
- Floor level changes or slopes
- Alcoves, recesses, or architectural features
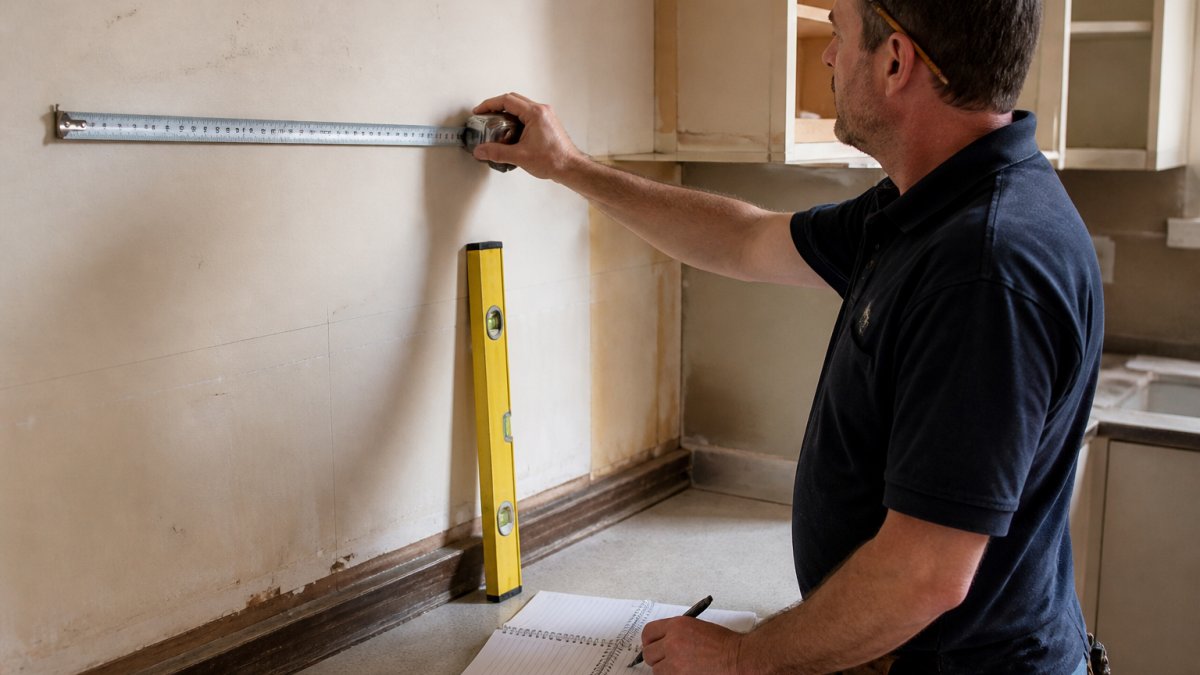
Use a metal tape measure, not a fabric one. Measure twice. Document everything on a sketch or floor plan.
Checking for tolerance and technical requirements
Once you have measurements, check for tolerance. Older properties especially have uneven walls and floors, a wall that looks straight might be 15mm out of plumb over 2 metres. Your custom units need to accommodate this.
Check these technical constraints:
- Plumb (vertical straightness) of walls
- Level (horizontal flatness) of floors
- Square (90-degree corners) of the room
- Clearance for appliance doors to open fully
- Access for utilities (water shut-off, electrics, gas valves)
- Ventilation requirements for cookers and extractor fans
If walls are significantly out of plumb, your custom kitchen unit design may need scribing (cutting the unit to follow the wall contour), this is normal and expected, it's why custom units exist.
Step 3: Plan Your Kitchen Layout Planning and Work Triangle
Layout determines workflow. A poor layout means extra steps, wasted effort, and daily frustration.
Start with the work triangle concept, the relationship between sink, refrigerator, and cooker. Ideal distances: sink to fridge 1.2-2.1m, fridge to cooker 1.2-2.7m, cooker to sink 1.2-2.7m. Too close feels cramped; too far means constant walking.
Galley, L-shaped, U-shaped, and island layouts explained
Different room shapes suit different layouts:
Galley layout: Two parallel runs facing each other, works for narrow spaces (keep 1.2m+ gap). L-shaped: Units along two walls, efficient but corners need solutions. U-shaped: Three walls, maximum storage, needs 1.5m+ circulation space. Island: Central island with perimeter units, requires 1m+ clearance on all sides.
Step 4: Create Your Kitchen Design Checklist Before Ordering
Before ordering custom units, every design decision must be documented and verified. This specification document becomes the contract between you and your supplier, errors at this stage are expensive to correct once production begins.
Translating measurements and choices into a formal specification
Your specification should include:
Carcass dimensions and configuration: Overall width, height, depth of each run; individual unit widths (typically 300-600mm modules); plinth height (usually 150mm, adjustable for accessibility); worktop thickness and overhang (25-40mm front, 50-100mm islands); filler panels or scribing allowances for out-of-plumb walls.
Door and drawer specifications: Material (MDF, solid wood, veneer, painted); style (flat, shaker, frame-and-panel, glazed, slab); colour and finish code; drawer fronts (matching or contrasting); handle and knob selections with finish; hinge type and soft-close specification.
Appliance cutouts and integration: Exact dimensions and positions of cooker, hob, oven, fridge, dishwasher, microwave; integrated appliance specs; ventilation requirements (ducting diameter, extractor position); electrical and plumbing access points.
Internal fittings and storage solutions: Shelf positions and materials; pull-out baskets, carousels, dividers; integrated waste bins; spice racks, utensil rails, open shelving; tall unit configurations (larders, pantries, broom cupboards).
Worktop and splashback details: Material and colour; sink and hob cutout dimensions; splashback height and material; edge profiles and finishes.
Verification checklist before approval
Measurements and fit: Do unit widths and heights match your survey? Are filler panels specified for out-of-square walls? Is plinth height correct? Do appliance cutouts align with actual dimensions (check manuals)? Is there adequate door clearance (90-120°)? Are corner units configured correctly?
Services and utilities: Are water inlet/outlet positions marked for sink and dishwasher? Gas inlet for cooker/hob? Electrical outlets for cooker, dishwasher, appliances? Ventilation ducting routed correctly? Service access points clear?
Finishes and hardware: Are door colours specified with product codes? Handle and knob selections confirmed? Hinge types and soft-close specified? Do all finishes match across the kitchen?
Workflow and functionality: Does layout follow the work triangle? Are frequently used items at accessible heights? Is storage positioned logically? Do tall units avoid blocking light?
Delivery and installation: Is delivery date confirmed and compatible with your timeline? Are unit dimensions compatible with doorways and access? Is installation sequence clear?
Sign-off and change control
Request a formal sign-off document from your supplier (printed or PDF copy of the design drawing with your approval signature and date). Keep this, it's your reference if disputes arise. If you need changes after sign-off, request a written change order. Changes after manufacturing are charged at cost plus labour and may delay delivery by weeks.
Step 5: Implement Custom Kitchen Storage Ideas and Cabinetry
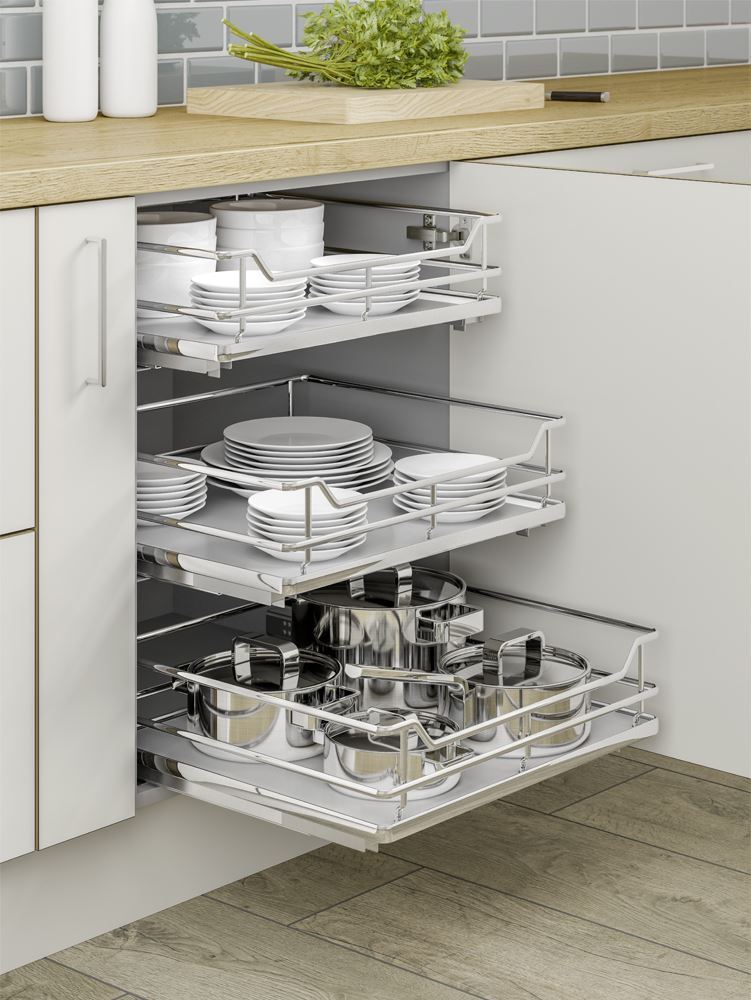
Storage design separates a functional kitchen from a frustrating one. Plan storage by use: frequently used items at eye level, occasional items on higher shelves, bulk storage in deep cupboards with pull-out baskets, appliances in dedicated spaces. Modern solutions include pull-out larders, corner carousels, drawer dividers, integrated bins, open shelving, and deep drawers. Your custom kitchen unit design should include these solutions. Wjskitchenwarehouse supplies custom carcasses with 14-day lead times.
Step 6: Review Your Design and Approve Before Manufacturing
Before manufacturing, review the complete design. Check: measurements match survey, appliance cutouts are correct, door/drawer openings clear, worktop dimensions and cutouts correct, finishes specified, hardware confirmed, delivery dates work. Use CAD drawings if available, Wjskitchenwarehouse provides detailed drawings so you can visualize the finished kitchen. Sign off in writing; once manufacturing begins, changes become expensive or impossible.
Step 7: Coordinate Installation and Final Handover
Installation requires coordinating utilities, building regulations, and structural work in the correct sequence. Poor coordination leads to delays, rework, and cost overruns.
Planning utilities and building regulation requirements
Before custom units are delivered, utilities and structural work must be planned and completed.
Plumbing: Confirm mains water supply reaches your sink position; if not, new pipework must be run before units arrive.
Electrical: Electric cookers/hobs need a dedicated 32A or 45A circuit from the consumer unit (install before units arrive). Dishwashers and appliances need 13A outlets positioned during design. Ducted extractors need an outlet and ducting to external wall/roof; recirculating fans need only an outlet.
Ventilation: Cookers need ventilation to remove steam and odours. Ducted extraction (to external wall/roof, 125-150mm diameter) is most effective; recirculating extraction (filters and returns air) is easier but less effective and requires regular filter replacement. Ducting must be short and straight (bends reduce efficiency).
Structural and building work: Removing walls or load-bearing elements requires a structural engineer's report and Building Regulations approval before units are fitted. Uneven floors or walls may need shimming or levelling before fitting.
Sequencing trades and managing dependencies
Work must happen in this order: (1) Utilities and structural work (2-4 weeks): electrical circuits, plumbing runs, gas supply, ventilation ducting, structural work, Building Regulations sign-off. (2) Custom units delivery and fitting (3-5 days): delivery, inspection, fitting, levelling, appliance connection, door/drawer adjustment. (3) Worktops and splashbacks (5-7 days): measurement, cutting, fitting, cutouts, tiling, sealing. (4) Final finishing (2-3 days): handles, knobs, shelves, fittings, appliance testing, sealant, handover.
Critical dependencies:
- Utilities must be complete before units arrive (you cannot fit units around incomplete plumbing or electrical work).
- Worktops cannot be fitted until units are level and secure.
- Splashbacks cannot be tiled until worktops are fitted (they sit on the worktop).
- Appliances cannot be connected until utilities are complete and tested.
Communicate the schedule to all trades at least 2 weeks before work begins. Confirm delivery dates with your supplier and utility work dates with electricians, plumbers, and gas engineers. A single delay cascades through the entire project.
Inspection and handover
When your custom units arrive, inspect them immediately against the approved design drawing:
Visual inspection
- Check for damage (dents, scratches, broken edges)
- Verify door and drawer finishes match the specification
- Check that all handles and knobs are fitted correctly
- Look for misalignment or warping
- Confirm appliance cutouts are correct size and position
Functional inspection (after fitting)
- Open and close all drawers and doors, they should move smoothly and close quietly (if soft-close is specified)
- Check that doors align with adjacent units (no gaps or overlaps)
- Verify that appliances fit correctly and operate
- Test water supply and waste drainage
- Test electrical outlets and appliances
- Check that worktops are level and secure
- Verify that splashbacks are properly sealed
Documentation
- Take photos of any damage or defects before installation begins
- Keep the delivery note and sign it only after inspection
- Request a certificate of installation from your fitter
- Request electrical certification from the electrician
- Request gas certification from the Gas Safe engineer (if applicable)
- Keep all warranties and instruction manuals for appliances
Defect resolution
- If units are damaged or incorrect, notify your supplier immediately (usually within 7 days of delivery).
- If installation defects are found (misalignment, poor finish, functional issues), notify your installer in writing within 14 days.
- Most suppliers and installers offer a 12-month warranty on manufacturing defects and workmanship. Beyond that, claims are difficult.
Once all inspections are complete and defects resolved, your kitchen is handed over. This is the point where your responsibility for maintenance begins and the supplier's liability typically ends.
Frequently Asked Questions
What measurements do I need to take before designing custom kitchen units?
Measure wall lengths, ceiling height, window and door positions, and existing appliance locations. Record the exact distance from walls to any permanent fixtures like radiators or pipes. Note electrical outlet positions and gas line locations. Take photos of the space from multiple angles. Accuracy to within 5mm is essential because custom kitchen units are built to your exact specifications. Any measurement errors will result in units that don't fit properly.
How long does the custom kitchen unit design and manufacturing process take?
The complete process from initial consultation to installation varies. Additional time may be needed if utilities require coordination with electricians or plumbers. Plan your project timeline to include contingency time, especially if you're working to a fixed deadline.
What is included in a kitchen design checklist before I approve my custom design?
Your checklist should verify appliance placement against your workflow, confirm storage solutions match your needs, check that sink and cooker positioning follows the work triangle principle, review material and finish selections for durability and aesthetics, and confirm all measurements are accurate. Ensure lighting positions are marked, check door swing clearances, and verify that circulation space allows comfortable movement. Review the CAD design from multiple angles and ask your designer to highlight any potential issues before manufacturing begins.
Can I modify my custom kitchen unit order after I've approved the design?
Modifications are possible but depend on the manufacturing stage. Changes requested before production begins are usually accommodated with minimal delay. Once manufacturing has started, modifications become more costly and time-consuming because carcasses are custom-made to your approved specifications. It's critical to thoroughly review your design and approval documentation before giving the go-ahead. Discuss modification policies and any associated costs with your supplier before placing your order.